

NEW – Easy Worm Mix!
April 8, 2015

Over the last few years we’ve been selling composting worms in the form of some sort of “mix”, rather than by the “pound” or “count”. This year I’ve decided to stream-line things even further by offering a single “Easy Worm Mix” (EWM). As the name implies, this is meant as a really EASY way to start up a typical home (or school etc) vermicomposting system.
Rather than adding a big gob of worms to a fairly sterile, foreign – potentially even hostile – environment, you are introducing loads of worms and cocoons (present in densities much closer to what nature intended) along with a large quantity of beneficial-microbe-rich habitat/food material that will help to kick-start your system. This virtually guarantees your success (if you stick to the guidelines)! And you also won’t need to pay nearly as much for it.
To demonstrate just how “EASY” working with EWM is, I set up a worm bin using 1 bag of it back on March 16th. I included the set-up procedure in the Easy Worm Mix Guide, but will share it here as well.
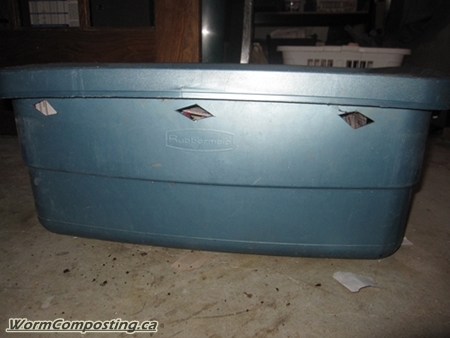
It’s important to note that the bin being used is a simple plastic (Rubbermaid) tub, with a volume of about 58 litres. The basic approach will still apply to other types of systems, but you may need to tweak your methods a bit (be sure to check out the guide for more info).
STEP 1 – Fill 1/2 to 3/4 of the volume with moistened bedding materials. My favorite is shredded corrugated cardboard, but for the sake of speed, I used mostly shredded newsprint for this particular bin (and it is a great bedding material as well).
Normally I recommend “as moist as you can get it without pooling on the bottom of the bin” (this assumes no drainage of course). When using Easy Worm Mix this is less of an issue because it has excellent water-holding capacity. Obviously you don’t want a deep puddle in the bottom of your bin, but if your nicely moistened bedding does create a bit of pooling down there this is not an issue at all.

STEP 2 – Add about 1/4 the volume (i.e. in relation to bedding that is) of well-optimized food scraps. These should be chopped up really well and (ideally) frozen-then-thawed. Anything you can do to help out the microbes and worms is highly recommended. Bulky, fresh scraps will take MUCH longer to break down, and can lead to other hassles such as fruit fly (etc) outbreaks.

Mix the scraps in with the bedding so they are well distributed throughout the bin.

STEP 3 – Now it’s time to add the Easy Worm Mix. Just so you know, a bag of the Easy Mix contains about 10 litres of worm-rich material. Remember, it’s definitely NOT about worm weight – especially since many of the worms are hatchlings or are still in cocoons – but be assured that you will end up with plenty of worms. Plus you have a lot of very helpful “living material”, which helps to inoculate the system with beneficial microbes, and just generally helps to kickstart the vermicomposting process.

Adding the mix is very EASY (lol). Just dump it on top, then very gently mix in down into the bedding/food.


STEP 4 – Lastly, I recommend adding a thick layer of dry bedding up top. This helps to keep the upper zone fairly dry (encouraging worms to stay down in the composting zone), and also provides you with an ongoing supply of bedding (assuming you keep it topped up) that can be mixed with the new food deposits as you go.

I wanted to also quickly show everyone the sort of air holes I now put in my plastic bins. I used to drill lots of holes in the lids and sides of my bins, but I’ve found that adding bigger (but far fewer) holes greatly enhances air flow. This is really important for the process, and helps to prevent your bin from getting too swampy over time (the thick dry bedding layer up top can help with this as well).

So there you have it!
As you can see, setting up a system with Easy Worm Mix is indeed incredibly EASY! No more need to set up the system ahead of time (I normally recommend 5-7 days), no more need to inoculate the system (with materials from another worm bin, composter etc), and no more worries about whether or not your worms are going to try escaping en masse (they won’t – unless you include worm-unfriendly materials in the system).
My recommendation – as with all new systems – is to leave the bin to sit for a week or so before starting to feed again. This allows the worms time to get settled in and to feed on the food you’ve already added.
My own system (one pictured above) is doing extremely well so far. I will provide an update in another blog post very soon (may actually be multiple updates by the time you read this post, so be sure to check out the blog links on the main homepage).
Comments
4 Responses to “NEW – Easy Worm Mix!”
Got something to say?
-
Recent Posts
- 2023 – Important Update
- Simple In-Ground Bucket – Late June Update
- “Outdoor Grade” Easy Worm Mix Explained
- Simple Breathable Bucket – 06-13-20
- Super Simple In-Ground Bucket Worm Bin
- Super Simple Breathable Bucket Worm Bin
- Easy Worm Mix 2019 – Important!
- Red Worms – Spring 2019 Update
- Easy Worm Mix Bins Update
- Easy Worm Mix FAQ


Just got my worms today and settled them in! Super excited thank you! Can’t wait to see how it progresses, also real neat to observe the different stages, was finding cocoons and “babies” outside of bag. Worm love!
That is fantastic, Jackie! Don’t hesitate to email any time if you have questions/concerns!
Interesting about them ending up outside of the bag but I guess that is the trade-off when using breathable bags (which are vitally important for worm health during shipping). The mix itself is quite rich at this time of year (and spring) – the fluctuating temperatures tend to stimulate breeding and cocoon laying.
I bought a “pound” of worms from another supplier. There doesn’t seem to be many worms in my Worm Factory 360. Do I need more worms to get things going or, wait for nature to get things going?
Hi Tim
Where is your bin sitting? If outside, it is not uncommon for worms to just “disappear” since these bins can heat up a LOT.
If indoors I would say just leave it to see if they bounce back – feel free to share more details about how the system was set up and maintained.