

Simple In-Ground Bucket – Late June Update
July 4, 2020
A few days ago I checked on my “Super Simple In-Ground Bucket Worm Bin“. Normally this would be a system I would leave in the ground for at least a couple of months, but I want to make this an educational project so I decided to yank it out of the ground and really see how things were coming along inside!
Firstly, I want to point out that taking an “easy” approach isn’t always best. In my case this involved using a bucket and lid that already had holes in them. The bucket holes are fine, but one of the lid holes is way too big and a fair bit of dirt has been getting knocked down into the system.
NOTE: This is probably a great spot to remind readers that any sort of dirt/soil is NOT actually something you should be adding to a worm composting system. I totally get the “worms and soil” connection – but please keep in mind these are composting worms, not your garden varieties!

Once the bucket was “yanked” I dumped it out into one of my trusty concrete mixing tubs for closer inspection. Right off the bat I was quite surprised by how many bigger, healthy looking Red Worms I was seeing. The “outdoor grade” Easy Worm Mix tends to have a lot of smaller worms – often not very obvious at all – since it is coming from very mature beds during some pretty warm/dry conditions.
Good conditions with some food, bedding and moisture can really help to pep them up.


Another good sign was finding quite a few cocoons. These are yellowish (when fairly new – transition to a brownish colour over time), tear-drop shaped capsules easily visible to the human eye (but can still be fairly well hidden).

Rather than just tossing everything back in the bin the way it was, I decided to separate out a lot of the rich material that could easily be used in the garden. I didn’t manage to get all the worms (or cocoons), though, so I ended up dumping it in one of my backyard composter (vermicomposting) systems.

In the bucket I put back all the habitat/food materials and most of the worms. Since I didn’t happen to have more kitchen scraps to add as food I just added some nicely aged grass clippings and bedding from another system.
NOTE: Grass clippings can be a great resource for outdoor worm composting systems (and even well-ventilated indoor systems), but this can be a tricky material to work with, due to potential for heating and ammonia release. When using the fresh green stuff I recommend thin layers up above your main “safe zone” (will aim to write a blog post about this).
As you can see below, the “nicely aged” stuff tends to have more of a brownish colour. It should have more of an earthy smell than anything pungent/unpleasant.

All that being said, I also like using clippings as a cover bedding material for open outdoor systems like vermicomposting trenches. It tends to dry out in the sun, becoming more of a light green or straw colour. This material is also a lot safer to use than the fresh stuff.
I grabbed some from my in-ground trench bins (mentioned near the end of my “‘Outdoor Grade” Easy Worm Mix Explained“ post) and added it in the upper zone of my little bucket system before putting the lid back on and mostly-burying it again.

As you can see, I am leaving the bucket partially visible and I have placed a rock directly over the big hole in the lid to help prevent more dirt from getting knocked down into it.

Overall, I am thrilled with how well this system is chugging along so far. It is a very small, enclosed plastic system sitting in a spot that gets direct sun for most of the day. These are several things you should normally avoid if you want to keep your worms alive outdoors – especially during the sort of brutal (heat wave) weather we’ve been seeing lately. Yet the worms are doing great.
Just goes to show how much protection the earth can provide – and helps to explain why I can get almost “pushy” about encouraging people to have some form of below-ground zone for the worms if at all possible. Whether it’s a small pit down below open-bottomed bins like backyard composters, or literally burying a “holey” bucket/bin down in the ground, it can make a world of difference.
On the flip-side, it is also a great way to protect worms during cold weather (in fact, you should be able to keep a colony of Red Worms alive over the winter in a below-ground system with plenty of bedding heaped over top).
Getting back to a small in-ground bucket system…
Just a reminder that: A) One bag of outdoor grade mix should probably be split between two or even 3 of these systems, B) You don’t need to (and likely shouldn’t) go too crazy with feeding – periodic, modest feeding and a habitat with lots of bulky, moist bedding (like shredded cardboard/newsprint) can work wonders, C) If you put these buckets close to plants you can help to boost growth directly (no need to harvest compost).
—
Stay tuned for more updates and let me know if you have any questions!
😎
Simple Breathable Bucket – 06-13-20
June 13, 2020

Back at the beginning of June I wrote about my “Super Simple Breathable Bucket Worm Bin”.
The idea was to demonstrate that a bag of “outdoor grade” Easy Worm Mix can in fact be used to start up an indoor system. I decided on a “breathable bucket” (instead of a more typical worm bin) because: 1) they are super cheap and easy to make, 2) the size is big enough to handle a full bag of the mix (plus bedding + food scraps), 3) they have excellent aeration yet are quite well sealed, and 4) I just happened to have some empty ones ready for use.
So far I’ve taken a very mellow approach, mostly leaving it alone (never a bad idea early on with a new system), and things seem to be chugging along nicely.
One interesting new development I wanted to share is the discovery of a much better way to secure the fabric lid. I’ve been using large elastics up until now. They can be a challenge to get on at times, and also break . That’s exactly what happened in this case, along with the next one I tried to get on – so I decided enough was enough.
Thankfully, it finally occurred me that I had some bungee cords lying around.
Yep, I’m kicking myself for not thinking of this earlier! They are much easier to get on and off, and they will certainly last a lot longer.

It’s worth mentioning that some gnats/flies have appeared in the system. Nothing to be overly concerned about – but this is another good reason for not adding too much food early on, and also highlights the value of completely closed (yet breathable) system like this. If it wasn’t for the check-up I wouldn’t have even realized the flies had appeared.
Anyway – will leave it at that for now. Should be interesting to see how things develop from here, and I’ll be sure to post more updates along the way.
😎
Super Simple In-Ground Bucket Worm Bin
June 12, 2020
I recently wrote about a simple “breathable bucket system” that is very easy and inexpensive to set up for indoor use. I wanted to illustrate that you can use a bag of my “outdoor grade” Easy Worm Mix for an indoor system – and I’m happy to report that the bucket bin is chugging along nicely in my basement as I type this.
In this post I want to tell you about an even easier bucket system you can put out in your yard. Aside from being a great way to grow a nice population of Red Worms and turn your kitchen scraps into “black gold”, these little units can serve as integrated fertilizer (and moisture) stations when you install them close to growing plants.
I’ll be the first to admit that outdoor vermicomposting can be more challenging than indoor vermicomposting due to various factors (eg climatic conditions, wildlife etc), but with in-ground systems – especially those using an actual container – your changes of success can be much greater.
On that note, let’s now look how I set up my basic bucket system today (in about 15 minutes).
Site selection is an important first step with any sort of system like this. Some considerations can include: 1) aesthetics (although, as I will show you, a bin like this can me hidden completely), 2) ease of access, 3) overall gameplan (eg. if you want to fertilize plants directly it should be close to growing plants).
In the case of this particular bin I decided to put it in a garden bed directly below a big honeysuckle bush (which has certainly benefited from all the nearby vermicomposting activities over the years, that’s for sure).

For the sake of getting the system set up as quickly as possible I grabbed a small bucket (pretty sure it is 3 gal) that already had some holes drilled in it. Bins like this absolutely need drainage holes so they don’t end up flooded, and I recommend holes in the side to allow the worms to move in and out (also very important if you plan to use them for garden fertilization). If you are using a larger bucket or bin, don’t hesitate to drill a lot more holes than what you see below (I normally would). Not a big deal with a bucket this small, as long as it has good drainage.

I wouldn’t say a lid is critical – but it is highly recomended in a lot of cases. It really helps to moderate moisture levels, and will keep bigger critters out. I do recommend having some holes in the top, however, so some rain water can get in. Once again, this just happened to be a lid I had on hand – I likely would have drilled more holes with a smaller bit. I’m certainly not concerned.

The pit should be deep enough that the top of the lid will be just below or at soil level.


I always like creating a “false bottom” with paper-based bedding materials. In this case, I added some shredded corrugated cardboard in the bottom of the pit itself and also in the bottom of the bucket. This will become an important “safe zone” for the worms – helping to protect and sustain them for extended periods even if they end up a bit neglected.


I next added a layer kitchen scraps. Normally I like to freeze and then thaw them since it helps to start the breakdown process (and with indoor systems it can kill fruit fly eggs in fruit peels as well).

Since the bedding was added dry, I decided to add some water at this point. One of the great things about these free-draining outdoor systems (unlike typical indoor bin) is that you don’t really need to worry about how much you add.

Before adding the worm mix I decided to add another layer of bedding. It’s nice to have a bit of a buffer zone between the worms and the food materials, but I also wanted to showcase some “scrunched” paper – another great bedding option, especially since most people will have good access to waste paper. Obviously if you happen to have a shredder, shredded paper is great as well.
As a sidenote, I always recommend avoiding glossy paper and cardboard as much as possible.

If setting up smaller buckets like the one I used, I recommend splitting a bag of worm mix between two. With a larger bucket (like one I used for my “breathable bucket system”) one bag may be fine – although there are definitely advantages to setting up multiple systems. These worms are very much adapted for taking advantage of favourable resources and conditions – in other words, when split into two separate bucket systems you might find that you end up with twice the size of population by the end of the season that you would have had you simply opted for one. It’s also great to have multiple buckets if you want to use them as fertilizer stations!
I brought the level of worm mix up close to the top of the bucket, leaving just enough room for some cover bedding.


Next, I secured the lid. As you can see, it’s not the most aesthetically appealing composter – but the good news is that you can easily cover it with mulch or even a thin layer of soil. Just make sure you remember where it is! 😉


Maintenance for a system like this can be pretty minimal. I recommend checking on it periodically and adding more food and bedding as the level drops down. It should stay pretty moist, but adding a little water each time isn’t a bad idea either.
These little buckets probaly aren’t going to be waste processing powerhouses for you, but they do offer a very cheap, easy and effective way to get started with outdoor vermicomposting and “vermigardening”.
😎
—
UPDATE: Be sure to also check out “Simple In-Ground Bucket – Late June Update“
Super Simple Breathable Bucket Worm Bin
June 1, 2020

This season (2020) I am putting most of my focus on helping people harness the “power” of composting worms in outdoor systems. I am selling an “outdoor grade” version of Easy Worm Mix – something I will write more about in another blog post.
But I still want to help those interested in starting up indoor systems. I am a huge proponent of indoor vermicomposting, especially during colder months of the year, and especially in cases where outdoor worm composting isn’t even an option.
In light of this, and as a way to help some people use the outdoor grade mix for indoor systems, I want to share a super simple indoor start up approach that I began testing in the fall of 2019 – involving the use of “breathable” buckets”.
I have written about this quite a bit on the Red Worm Composting blog (one of my other websites, in case you weren’t aware) so I won’t go too deep into the backstory. But here is a YouTube video I created that will help to lay some important groundwork.
The long and the short of it is that regular buckets are NOT usually a good choice for use as a worm bin, but when you add (very easy-to-intall) bottle cap vents – or something comparable – they can work really really well. They don’t take up much room and are very easy to move around as well – so I highly recommend you give them a try, especially if you are looking to reduce your vermicomposting start-up costs.
—
My outdoor grade Easy Worm Mix is a larger volume (~ 18 litres) of rich, “living” habitat material, containing not only Red Worms, but a handful of other worm species. Just generally, there is a very rich ecosystem of composting organisms – and this is partially why I suggest an outdoor set-up. Things like gnats, which may or may not gain a foothold, can certainly be more annoying indoors. And the sheer volume of the mix makes it less well suited for something like a smaller stacking bin.
One of the great things about the bucket system we are looking at here is that it keeps things contained (yet still provides great air flow) – we’ll touch on this again a bit further down.
On that note – let’s now look at how I set up one of these buckets with a single bag of the outdoor mix.
Step #1 with most of my worm composting systems is creating some form of “false bottom” with cardboard/paper. It just so happens that each bag of the mix has a decent amount of shredded newsprint down in the bottom, so this is what I put down in the bottom of my bucket.


From there on up it was just a matter of adding thin, alternating layers of material. First some of the Easy Worm Mix…

…then a thin layer of bedding (note: flat sheets of paper aren’t ideal since they can impede worm and air movement – I recommend either shredding or “scrunching”).

Next I added my first layer of kitchen scraps. I keep a bucket under the sink for these wastes and once the bucket is filled it is usually frozen and thawed before use. Chopping + aging + freezing/thawing greatly assists the microbes (and the worms) so these optimized waste mixes will tend to get processed more quickly than fresh scraps.

I then continued with these alternating layers all the way up (you really only need 1-3 layers of the food, however – it’s the bedding and the mix that are the most important during the start-up phase).


I always recommend ending with a thick cover layer of bedding.

I actually left the bin as-is for a number of days in the basement before adding my covers. As you can see, the activity of the worms had already led to a drop in the overall level of material in the system.

Because I use a very breathable fabric lid on these buckets I also lay a loose plastic bag over the surface of the composting zone. This helps to retain a bit more moisture. The fabric (cut from an old bed sheet) is secured with a large elastic band.


—
What’s great about a simple system like this is:
1) I had no problem using the entire bag of mix – plus bedding and food materials
2) In a climate controlled location (eg this one is sitting in my basement) this could sit for extended periods without any further attention
3) If any sort of gnat (etc) outbreak does happen to materialize, the lid and vents will keep it fully contained.
4) In a shady location, a bin like his could even do fine outside – my only (major) caveat would be to make sure it gets moved indoors during heavy rainfall so it doesn’t end up flooded. (I will be writing a blog about another type of bucket system that is actually a better choice for those of you who have some yard space to work with)
If this system looks like something you would like to try, please be sure to watch the video above since the vents are a very important feature (i.e. don’t just try this with a regular bucket).
Let me know if you have any questions!
😎
Easy Worm Mix Bins Update
July 8, 2015
It’s been quite some time since I wrote about my “Easy Worm Mix Test Bin(s)”. At the end of April I made a video showing how I “split” the bin, leaving me with two separate systems. Then, in May, I wrote about (on my Red Worm Composting website) using grass thatch as a “living material” in the systems. (See “Grass Thatch as a Living Material” and “Grass Thatch Vermicomposting – Update”.)
After that, I basically just left the bins to sit, without any further feeding for about a month! As I mention in the video, when you are using an enclosed plastic bin system, as long as you have plenty of bedding materials, and keep the bin in a location with moderate temperatures, the worm population can continue to thrive for months.
Towards the end of the video, I show just how well the worm population has done – even with my neglect.
Easy Worm Mix FAQ
May 16, 2015
I put this FAQ together to address some of the typical questions that people can have about Easy Worm Mix. I will likely add more questions and answers over time.
I highly recommend that you also refer to the Easy Worm Mix Guide and this blog post: “Easy Worm Mix 2019 – Important!“.
Are there worms in Easy Worm Mix, or do I need to purchase them separately?
Yes – this is a Red Worm culture intended to start up a new worm composting system. Each bag of Easy Worm Mix will likely have at least 1000 Red Worms – and hundreds of cocoons (each can release an average of 3 hatchlings) – BUT, the vast majority of the worms will be hatchlings and juveniles that can be a lot more difficult to see (often hiding in habitat material etc). Most batches of Easy Worm Mix are prepared by hand and allowed to sit for at least 6 weeks (during this time the “breeders” produce an abundance of cocoons and young worms start to hatch out) in a fully climate-controlled environment. The only exception will be during times of high-demand when very high-quality worm- and cocoon-rich material can be harvested from outdoor beds (eg. in the spring).
—
What kind of worms are in Easy Worm Mix? Are there different kinds?
The worms in the Mix are Red Worms (aka “Red Wigglers”) – Eisenia fetida/andrei (two very closely related worms that commonly occur in mixed populations). It is very unlikely that you will end up with any other types of worms in your batch.
—
How many worms are in this mix?
As touched on earlier, there should be at least 1000 Red Worms – quite a few of them being mature “breeders, but the vast majority of them being small hatchlings and juveniles. There should also be 100’s of cocoons in each bag (each release 3 new worms on average).
This is an ideal mix for starting up a new worm bin, for stocking an outdoor composter (as long as it has been prepped for vermicomposting), for starting various “vermigardening” systems, and even for helping to “fix” an active vermicomposting system that isn’t performing very well (but in this case, please make sure to provide me with details so we can determine what’s causing the problems before the mix gets added). It is likely NOT well suited for those who need mostly larger adult worms (eg for use as fishing bait etc)
—
Is this the same thing as “a pound of worms”?
Easy Worm Mix is definitely a different sort of product – one that is much more “natural”, and likely more beneficial for those trying to start up a successful vermicomposting system. Yes there are plenty of bigger “breeder” worms in there but Easy Worm Mix is more of a “nursery mix” – so the actual weight of the worms won’t be anything like a pound. There are lots of much smaller juvenile worms and loads of cocoons, so the “future potential” of a mix like this is substantial. Once all the younger worms mature (usually in a matter of weeks) it’s conceivable that you could end up with more than a pound of worms, but this can depend on many factors. My recommendation is to not get hung up on worm weight, since this is not a good indicator of composting potential on its own.
One bag of the mix is great for starting a typical home worm bin or even a backyard composter – and you’ll likely be pleasantly surprised by how quickly your population of worms seems to grow if you treat them well!
—
How much mix do I get?
Each bag Easy Worm Mix contains about 10 litres of worm- and cocoon-rich material. I strongly recommend adding the entire bag to your system (or splitting it up evenly between multiple systems) since the habitat material plays a very important role in helping the worms settle into their new environment (and that is also where most of the young worms and cocoons are).
If (for example) you have a small stacking system and there isn’t enough room in a single tray for the worm mix + bedding/food, I would suggest either starting up another system (can be a very basic plastic tub with air holes), or at least keeping the remaining material in the breathable bag (in a climate controlled location) and continuing to add it to the system over time (as the volume of material in the tray decreases).
—
I am looking for good fishing worms. Is Easy Worm Mix a good choice for me?
Yes and no. Yes, I would recommend the mix to anyone with an interest in starting up their own bins so they can raise their own worms for fishing. But NO, a bag of Easy Worm Mix is not ideally suited for being taken fishing and then the worms used for bait.
The “breeder” worms are likely a decent size for fishing (especially if you are interested in trout or panfish), but I recommend you keep those worms so they can continue producing new cocoons for you (adult Red Worms can produce 3 cocoons each per week when conditions are favorable).
There are various strategies you can use to grow bigger worms as well.
—
Can I add Easy Worm Mix to my garden?
It’s very important to realize that Red Worms are NOT really soil worms, like most of your typical “garden varieties”. They are what’s known as an “epigeic” species – earthworms that live very close to (often above) the soil surface in rich deposits of organic matter.
The good news is that you CAN still use Easy Worm Mix in your garden, but you’ll need to create an optimized environment for the Red Worms in order to gain the maximum potential benefit.
I’ve had great success with various “in situ” composting systems – that is, composting systems that are actually located right in (or beside) my gardens – such as vermicomposting trenches and “Worm Towers”.
Be sure to check out this blog post for more information:
Gardening With Composting Worms
—
Can I use Easy Worm Mix in a backyard composter?
YES, absolutely! This is actually a fantastic way to put this mix to good use. But you DO need to make sure the system is set up properly! The good news is that your chances of success using Easy Worm Mix are likely higher than when you purchase bulk composting worms, since the mix contains lots of valuable starter habitat/food, plus plenty of beneficial composting organisms.
Check out this blog post to learn more:
Backyard Composting with Worms
—
I’ve read that releasing worms outdoors can impact local forest ecosystems. Should I be concerned with these worms?
In some locations, especially where native worm populations were not previously present, certain earthworm species are indeed creating problems. This can commonly be linked to fishermen dumping out their bait worm containers in remote fishing locations.
It’s important to not make sweeping generalizations about this, however (i.e all worms are “invasive” or just generally “bad for the environment”). In the scientific literature there isn’t any documentation (that I know of) implicating Eisenia sp worms (those typically used for vermicomposting – and ones we sell) as harmful. Some have included them on “watch lists”, but in my humble opinion this is a case of “throwing out the baby with the bath water”. Eisenia worms are adapted for life in habitats containing very rich organic wastes, so you’ll very rarely even find them in the “wild”. They certainly aren’t voracious forest leaf litter consumers (unlike some of the Lumbricus species). They are usually closely associated with human habitation – eg on farms, or in compost heaps in urban settings.
If you liked to learn more about this, you may want to read an article I posted on my other website:
Do Composting Worms Pose a Threat as Invasive Species?
—
I’m not seeing many worms. Is this mix going to work?
Absolutely! You just need to follow my instructions and hold yourself back from trying to do too much too soon (the new vermicomposter curse). As touched on earlier, this is what I refer to as a “nursery mix”. In other words, there are loads of smaller worms – many almost invisible when covered in habitat material – plus many cocoons (which release an average of 3 new Red Worms each), along with quite a few adults. The way this mix is produced there is far more emphasis on worm and cocoon abundance (and health) than on size/maturity of the worms.
You are also receiving a good quantity of what I like to refer to as “living material” (containing countless beneficial composting organisms). This alone will greatly assist the process.
—
Can I set up a bin like you did in the Easy Worm Mix Guide and leave it outside?
Generally, I don’t recommend keeping enclosed plastic bin systems outdoors since they don’t offer much of a buffer against weather extremes.
If the bin ever receives direct sunlight, especially during summer months, temperatures inside could potentially climb past the acceptable range (of about 30-34 C) very quickly, and the worms could end up dying since they wouldnt have a cooler location to escape to.
Similarly, during periods where temps are below the freezing mark, a small plastic bin would offer virtually no protection, and the contents would likely freeze solid. This would obviously kill the worms as well.
All that being said – as long as you keep the system in a protected (shaded, and just generally sheltered) location, you should do OK. And also don’t forget what I said earlier about the potential of backyard composters (and various other options) as well. There are definitely better options for keeping composting worms outdoors (and for overwintering them successfully etc) than typical plastic bins!
Easy Worm Mix Blog Posts
NEW – Easy Worm Mix!
Easy Worm Mix Bin Update
Straw Bale Gardening with Easy Worm Mix?
Feeding My Easy Worm Mix System
Splitting The Easy Worm Mix Test Bin
IMPORTANT NOTE: Most of these posts were written about the original Easy Worm Mix – but they are still relevant for anyone using the newer versions of the mix. Please also make sure to read this blog post for a more recent explanation of what Easy Worm Mix is all about: “Easy Worm Mix 2019 – Important!”
Have any additional questions about Easy Worm Mix? Please feel free to email me any time!
Feeding My Easy Worm Mix System
April 10, 2015
As promised, I shot a new video today showing how I am “optimizing” my food wastes and adding them to the Easy Worm Mix system (again, the one used as an example in the Easy Worm Mix Guide).
It shows my basic chopping process and how I mix the wastes with “living materials” already in the system (remember, Easy Worm Mix comes with a lot of this) to help accelerate the break down process even more.
Based on the success of this system I will actually be showing you how to “split a bin” next week (be sure to look for that post – and other updates – on the blog if you are reading this at a later time). This will leave me with TWO thriving vermicomposting systems – all started from a single bag of Easy Worm Mix!
Easy Worm Mix Bin Update
April 9, 2015
Yesterday (April 8th) I shot a video showing how my Easy Worm Mix bin (the one used as an example in the Easy Worm Mix Guide) is coming along.
Since starting it up on March 16th, I have fed the bin twice, not including the food added when I set up the system:
March 27th – 1.54 kg (3.40 lb)
April 5th – 1.60 kg (3.53 lb)
I plan to feed again tomorrow.
For a brand new enclosed plastic tub worm bin, these are pretty impressive numbers.
Speaking of “impressive numbers”, if you watch the video you`ll be able to get a feel for the sheer quantity of worms in the system. Easy Worm Mix might not look like much fresh out of the bag, but it`s important to remember that a lot of the Red Worms come as tiny hatchlings, and unhatched cocoons (each of these releases an average of 3 babies), and these worms grow quickly when you provide them with the right environment.
Plus, the “living material” that comes in the mix, when mixed in with optimized food wastes (chopped up really well, and frozen-then-thawed), greatly accelerates the process. There is no real lag time between when the food is added and when the worms start moving into it and actively feeding.
During my quick exploration yesterday I kept hitting on incredibly dense pockets of worms in my most recent feeding zone.
Tomorrow I plan to shoot a video showing exactly how I am adding food to the system.
Stay tuned!
😎
NEW – Easy Worm Mix!
April 8, 2015

Over the last few years we’ve been selling composting worms in the form of some sort of “mix”, rather than by the “pound” or “count”. This year I’ve decided to stream-line things even further by offering a single “Easy Worm Mix” (EWM). As the name implies, this is meant as a really EASY way to start up a typical home (or school etc) vermicomposting system.
Rather than adding a big gob of worms to a fairly sterile, foreign – potentially even hostile – environment, you are introducing loads of worms and cocoons (present in densities much closer to what nature intended) along with a large quantity of beneficial-microbe-rich habitat/food material that will help to kick-start your system. This virtually guarantees your success (if you stick to the guidelines)! And you also won’t need to pay nearly as much for it.
To demonstrate just how “EASY” working with EWM is, I set up a worm bin using 1 bag of it back on March 16th. I included the set-up procedure in the Easy Worm Mix Guide, but will share it here as well.
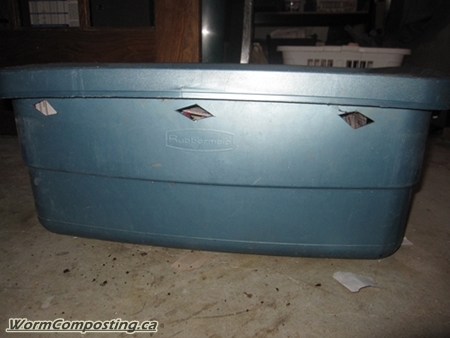
It’s important to note that the bin being used is a simple plastic (Rubbermaid) tub, with a volume of about 58 litres. The basic approach will still apply to other types of systems, but you may need to tweak your methods a bit (be sure to check out the guide for more info).
STEP 1 – Fill 1/2 to 3/4 of the volume with moistened bedding materials. My favorite is shredded corrugated cardboard, but for the sake of speed, I used mostly shredded newsprint for this particular bin (and it is a great bedding material as well).
Normally I recommend “as moist as you can get it without pooling on the bottom of the bin” (this assumes no drainage of course). When using Easy Worm Mix this is less of an issue because it has excellent water-holding capacity. Obviously you don’t want a deep puddle in the bottom of your bin, but if your nicely moistened bedding does create a bit of pooling down there this is not an issue at all.

STEP 2 – Add about 1/4 the volume (i.e. in relation to bedding that is) of well-optimized food scraps. These should be chopped up really well and (ideally) frozen-then-thawed. Anything you can do to help out the microbes and worms is highly recommended. Bulky, fresh scraps will take MUCH longer to break down, and can lead to other hassles such as fruit fly (etc) outbreaks.

Mix the scraps in with the bedding so they are well distributed throughout the bin.

STEP 3 – Now it’s time to add the Easy Worm Mix. Just so you know, a bag of the Easy Mix contains about 10 litres of worm-rich material. Remember, it’s definitely NOT about worm weight – especially since many of the worms are hatchlings or are still in cocoons – but be assured that you will end up with plenty of worms. Plus you have a lot of very helpful “living material”, which helps to inoculate the system with beneficial microbes, and just generally helps to kickstart the vermicomposting process.

Adding the mix is very EASY (lol). Just dump it on top, then very gently mix in down into the bedding/food.


STEP 4 – Lastly, I recommend adding a thick layer of dry bedding up top. This helps to keep the upper zone fairly dry (encouraging worms to stay down in the composting zone), and also provides you with an ongoing supply of bedding (assuming you keep it topped up) that can be mixed with the new food deposits as you go.

I wanted to also quickly show everyone the sort of air holes I now put in my plastic bins. I used to drill lots of holes in the lids and sides of my bins, but I’ve found that adding bigger (but far fewer) holes greatly enhances air flow. This is really important for the process, and helps to prevent your bin from getting too swampy over time (the thick dry bedding layer up top can help with this as well).

So there you have it!
As you can see, setting up a system with Easy Worm Mix is indeed incredibly EASY! No more need to set up the system ahead of time (I normally recommend 5-7 days), no more need to inoculate the system (with materials from another worm bin, composter etc), and no more worries about whether or not your worms are going to try escaping en masse (they won’t – unless you include worm-unfriendly materials in the system).
My recommendation – as with all new systems – is to leave the bin to sit for a week or so before starting to feed again. This allows the worms time to get settled in and to feed on the food you’ve already added.
My own system (one pictured above) is doing extremely well so far. I will provide an update in another blog post very soon (may actually be multiple updates by the time you read this post, so be sure to check out the blog links on the main homepage).
Composting Worm Mix Critters
May 24, 2014
Here is a video I created for my other website (Red Worm Composting), but with “Composting Worm Mix” customers in mind. A lot of people have wondered about the springtails in particular, so hopefully this will help!
In general, as stated in the video, most of the organisms you find in a worm composting system should NOT be a cause for major concern. If you are seeing huge numbers of any particular creature it is likely an indication that the system is out of balance. The one exception I can think of is the springtails – I often have HUGE numbers of them even in really well-optimized systems (like my Worm Inn Mega system for example – will write more about that very soon).
Sorry there is not audio for the video. I decided it was more important to get the video finished and released than to take extra time to add voice narration (I knew music would be too risky, since people have a huge range of tastes).
Hopefully you find it interesting/helpful!
Euro-Red Mix in a Stacking Worm Bin
May 29, 2013

It’s been said (even by yours truly, in the past) that European Nightcrawlers (Eisenia hortensis) are not well suited for life in stacking worm bins – or really, any other sort of “flow-through” type system.
If you follow the Red Worm Composting blog, you’ll know that my assumptions about this worm species have, however, changed quite a lot in just the past 6 months (be sure to check out “European Nightcrawlers – In More Detail” if you haven’t already)!
I recently resumed my testing of the use of Euros in my “Worm Factory” system – a project I had started last year, but ended up discontinuing prematurely due to lack of space (among other things). I set up with first tray with shredded (drink tray) cardboard bedding, food waste, and some very-well-aged horse manure, then stocked it with two bags of our Euro-Red Mix.
IMPORTANT UPDATE (SPRING 2015) – We are now selling “Easy Worm Mix”, which only contains Red Worms. You can learn more (and place orders) on the following pages:
Shipped Order Pricing
Pick-up Order Pricing
A little over a week later (this past Saturday), I continued to plow right ahead by adding a second tray (set up in a similar manner to the first). This definitely isn’t how quickly I would recommend adding the second tray in a system like this – probably better to actually let it go for a month or two – but I’m very eager to see how readily the Euros will move up in the bin. They are known for being deep diving, moisture-loving worms – which is why many have suggested they are not ideal for vertical migration systems – so, in theory, they should all remain down in the first tray, while the Red Worms move up.
What’s funny, though, is that I’m really only finding Euros in the second tray so far – and it actually seems as though quite a few have already moved up!
Just goes to show that you should never make ASSumptions about composting worms. I’ve been at this for more than 13 years now, and I am STILL surprised (and re-educated) on a regular basis!
That being said, I should mention that in my larger, single-compartment flow-through system (called the “VermBin48”), the Euros seem to be living up to their reputation as deep divers. I had to install a “skirt” and catch-tray system in order to avoid losing worms out the bottom of the bin. It will be very interesting to see how things progress in the VB48 over time though. Once the false bottom has completely rotted out and the lower zone dries out quite a bit, there may end up being far fewer of the worms down near the bottom.
I’ll be sure to keep everyone posted on both (stacking bin & VB48) fronts!
Backyard Composting with Worms
May 24, 2013

For some reason, not a lot of people associate backyard composters with vermicomposting. It’s a shame, really, because composting worms can offer a fantastic way to speed things up, and to improve the quality of compost produced in these systems.
In most cases, these bins are NOT really “hot (thermophilic) composting” since they don’t have the critical mass required for sustained heating (typically ~ 1 cu yard or more, assuming proper C to N ratio of materials). They tend to be closer to the “mesophilic” range of temps a lot of the time, and decomposition processes inside tend to occur more slowly as a result.
People often don’t really use them properly either. A lot of the time they seem to be ignored altogether, or basically used as garbage cans for random deposits of resistant organic matter.
Even the “Compost Guy” has been guilty of this more often than he’d like to admit! Below are images showing one of my neglected systems (before and after the bin was lifted away).


Well, today it’s time to turn over a new leaf (lol), and show you how you can convert your sad, underperforming backyard composter into a lean, mean vermicomposting machine!
Here are some of the KEY things to keep in mind:
1) We need to establish a high quality composting worm habitat BEFORE we try introducing the worms. You can’t just add them to a dry, neglected composter filled with old sod and sticks and expect them to turn everything into black gold!
As such…
2) LOTS of (fairly inert) “bedding” materials need to be added, especially early on.
In the same vein…
3) We need to avoid adding too much N-rich “food” material initially, since it can cause everything to overheat (among other potential problems).
4) Ongoing watering will be VERY important – especially if you are using a wooden bin. Adding lots of water-rich food waste will help, but periodic showers from your watering can will likely be needed as well. Taking off the lid during rainy weather can certainly help too.
Here are some of the supplies I used for my set-up:
1) Newsprint – used to lay across the bottom of my pit (more on that in a minute)
2) Moistened, shredded cardboard – represents a significant percentage of the initial habitat.
3) Bag of mixed compostable kitchen scraps – I want the worms to have at least some food available early on.
4) Well-aged horse manure – this is pretty well the “ultimate” vermicomposting material. It’s what I would call a “living material” since it is full of beneficial microscopic (and macroscopic) composting organisms. It provides excellent habitat AND food value, without the risk of excess heating, ammonia release etc. It should come from a heap that has sat outside, exposed to the elements, for at least a couple of months. It should be dark in colour and smell earthy. Bagged manure from a garden centre is definitely NOT the same thing!
Other “living materials” include old, rotten leaf mulch, and really old grass clippings (again earthy smells we’re after – not bad smelling stuff).
5) Worms of course! If you are fairly new to all this, you might want to set things up and leave everything to age for a week or two before adding the worms. Since I know what I’m doing, and since I had plenty of beautiful aged horse manure on hand – I felt totally comfortable with adding the worms on the day of set-up.

The first thing I recommend doing when setting up a backyard composter for vermicomposting is to dig a decent sized pit down below where the bin will sit. This will offer the worms a cooler/warmer zone (likely with higher moisture levels as well) they can retreat to during weather extremes. If you live some place that gets really cold and/or hot, you should dig at least a foot down – just make sure the diameter of the hole is smaller than that of the base of your composter!

Lining the hole is optional – but I decided to do so this time around to help keep things somewhat contained, and to hopefully increase moisture levels down below. If you live in an area with moles you may want to go all out, with something like thick landscape fabric.
NOTE: Some people might assume this is done to avoid having the worms escape into the soil (one of the concerns people seem to have about backyard vermicomposting in general). It’s important to keep in mind that the worms being used are composting worms. They are specialized for life in deposits of rich organic matter (they are not soil worms). So they will be more than happy to stick around if you give them what they need.

Next, I filled the hole with moistened, shredded cardboard, aged manure, and food waste – before mixing everything up really well.


I happened to have some rock dust on hand so I added some of that as well. This is optional, but if you happen to have some ag lime (or dolomitic lime), you may want to sprinkle some of that in as well. I next watered everything down thoroughly.


Next, it was time to add the composting worms. In this case it was probably the equivalent of 3 bags of “Euro-Red Mix”.
IMPORTANT UPDATE (SPRING 2015) – We are now selling “Easy Worm Mix“. It does not contain any European Nightcrawlers.
I simply dumped them on top and let them move down on their own (did so quite quickly so as to get away from the light). This is an ideal application for the Euros since they tend to do very well in larger systems that are not being disturbed regularly. Red worms will of course thrive in this type of environment as well!

Next it was time for even more aged manure, more bedding, and more water.


I then put the bin over top…before adding…
…more aged manure
…some semi-aged grass clippings (if you are new to this I recommend waiting until the habitat zone is well-established before adding any – and NEVER mix them in)
…and some straw over top to help keep moisture in.


Finally, I lay an old towel over the top and soaked in down. This helps to keep moisture while also helping with the evaporative cooling effect.

It’s important to note how low in the bin the level of materials was left. This was especially important given the fact that I was adding the worms the same day. If you plan to fill the bin with lots of materials at once, you should definitely leave it to sit for at least 1-2 weeks, and only add worms once temperatures have dropped down below 30 C or so.
The advantage of primarily focusing on creating a high quality habitat zone early on is that we won’t need to be nearly as concerned about what we are adding moving forward. As long as the worms have a safe zone they can stay down in, you can get away with adding a wider variety of materials (and more of them) than would be recommended for a typical worm bin.
I should mention that this post was partially inspired by the following video:
It’s fairly long, and it can be difficult to understand what Mick is saying at times, but it’s well worth watching if this is a topic of interest!
I’ll be sure to keep everyone posted on how my system is doing this summer – and will be exploring various related topics (including what protective measures we can take as winter approaches) here as well!
My Winter Worm Bed
February 23, 2010

The ‘Winter Worm Windrow’ is doing very well – hoping to start harvesting worms from it soon!
Howdy folks – it’s been ages since my last blog post! Sorry about that.
I just wanted to write a little about my winter worm composting bed. Those of you who follow my other sites may already know that I’ve been testing out various (outdoor) winter worm composting systems for the last few years. For whatever reason, I get a kick out of challenging myself in this manner, and it’s certainly been fun!
After a fairly rocky start (primarily due to letting things slide over the holiday season), my windrow bed has definitely made a nice comeback! Temperatures in the middle of bed have been up over 20 C for the better part of a month now. When I dug around in the bed a few days ago I was happy to see that the Red Worm population appears to be thriving as well.

I am hoping to start harvesting worms from the bed fairly soon, so if you are interested in ordering some worms (or have been on my waiting list), you may be in luck in the next week or so!
8)
[tags]worm composting, vermicomposting, winter composting, windrow, worm bed, red worms[/tags]
Red Wigglers Worms and the GTA
April 27, 2009
Hi Everyone,
I hope all of you in Southwestern Ontario are all enjoying some of this outstanding weather we’ve been having!
I just wanted to write a quick post about delivery to the Greater Toronto area. As mentioned on the Red Worm page, we are located in Elmira (about 1.5 hour drive from downtown T.O.), but shipping to the GTA (or the entire ‘Golden Horseshoe’ for that matter) is a piece of cake. Generally with our ‘Expedited’ Canada Post delivery, it takes 1-2 days for the worms to reach their destination (essentially “next day” or the day after), and costs $10-$13 in most cases (for small to medium orders) – so likely less than you’d spend in gas money to come pick them up in person (not to mention the time saved).
A Toronto customer recently informed me that some suppliers are experiencing shortages these days. This certainly isn’t a problem for us at the moment (after a tough few months in the winter, it;s a nice change!) – assuming you are happy with Red Wigglers (Eisenia fetida) – the Cadillac of the composting worms. haha
😉
We are still out of European Nightcrawlers (Eisenia hortensis – NOT to be confused with Canadian Nightcrawlers / Dew Worms, which we do not sell) unfortunately, and I’m not sure when we might have them again. I will certainly keep everyone posted. Definitely some demand for those!
Anyway, if you ARE in the Greater Toronto Area and you are interested in getting into vermicomposting, feel free to get in touch!
8)
[tags]vermicomposting, worm composting, gta, toronto, mississauga, oakville, milton, burlington, ajax, pickering, oshawa, brampton, hamilton, niagara, scarborough, worms, composting worms, red worms, red wigglers, eisenia fetida[/tags]
Vermicomposting Trenches
April 26, 2009

Last summer I wrote about my attempt to deal with huge quantities of compostable waste materials from a very popular local restaurant. As mentioned, it was certainly a serious challenge, and in the end I had to abandon the project since I simply couldn’t keep up with all the material (keep in mind, I live on a fairly small suburban property – haha).
One of the really positive things to come from the experience was my discovery of the ‘vermicomposting trench’ method. In desperation, I came up with various waste-burial strategies since they seemed to be the best bet for reducing foul odours.
To learn all about my fun with vermicomposting trenches, be sure to check out my ‘trench wrap-up post‘ over at RedWormComposting.com – there are links at the end, leading to the various other posts I wrote on the topic.
Anyway, I’ve decided to use my trenches this year, and to create at least a couple more. I’m happy to report that I’ll be taking a much more leisurely approach however – I learned my lesson as far as biting off more than I can chew goes! I have been seeking out sources of organic waste, but am making sure I’m dealing with amounts I can handle.
Unlike last year, farmyard manure will likely play an important role in keeping my trenches (and of course the plants) fed. Red Worms absolutely go crazy for aged manure, so it should be a win/win situation for sure.
I check the status of the trenches recently, and was amazed to find loads of small Red Worms alive and well! I’ve seen how cold-hardy these worms can be, yet I still never cease to be amazed by how easily they seem to survive southern Ontario winters.
Another material I’ll likely be using a lot of is coffee grounds. I was given a large quantity of them earlier this spring, and am hoping to secure a steady supply of them moving forward. Once it is wet and starts to decompose, the worms seem to go absolutely will for this material.
As far as what I’ll be growing goes, I don’t think too much will change along the fence-line. I love tomatoes and zucchinis too much to trade them for something else. I was however thinking of moving my pumpkin patch from the sandbox garden (if you checked out those other trench articles you will know what I’m talking about) and growing some corn in this bed this year. Given the size of the sandbox bed, I think it will be more for show than anything – I certainly won’t get a huge crop of corn. But I DO like to have a nice demonstration garden, so it should be fun. I was thinking of growing runner beans along with the corn (the way the native indians did) – they will help to provide nitrogen for the corn plants, and can use the rigid stalks for support.
I was also thinking of putting in an all-natural privacy fence of sunflower plants along my back fence-line. To help fertilize these plants I will run a trench in front of that bed as well.
Anyway, I’ll certainly be writing more about all this as the season progresses.
If you are looking for an interesting green gardening strategy and/or a great way to actually benefit from adding composting worms to your garden, this is an excellent approach. Obviously, adding LOTS of worms would be the best way to kit the ground running, but even inoculation with a bag of Compost Ecosystem would get your worm population started.
8)

